Test-driving AzureML: Machine Learning in the Cloud
On June 16th, Microsoft announced their cloud-based Machine Learning solution AzureML as “a fully-managed cloud service for building predictive analytics solutions”. Last Friday, just before the Worldwide Partner Conference, AzureML went into public beta. Which means it showed up at my Azure dashboard, leaving me no choice but to try it :-).
After trying some examples and building a few experiments (‘experiment’ is the AzureML-name for a Machine Learning solution) using the tutorials Microsoft has provided on the Azure documentation sites, my enthousiasm is growing. In order to provide an overview of the product, I’ve written a small review on the following topics:
- User interaction (Ease of use, GUI)
- Comprehensiveness of available modules
- Integration of R
- Opening up your experiments to the world
User interaction (Ease of use, GUI)
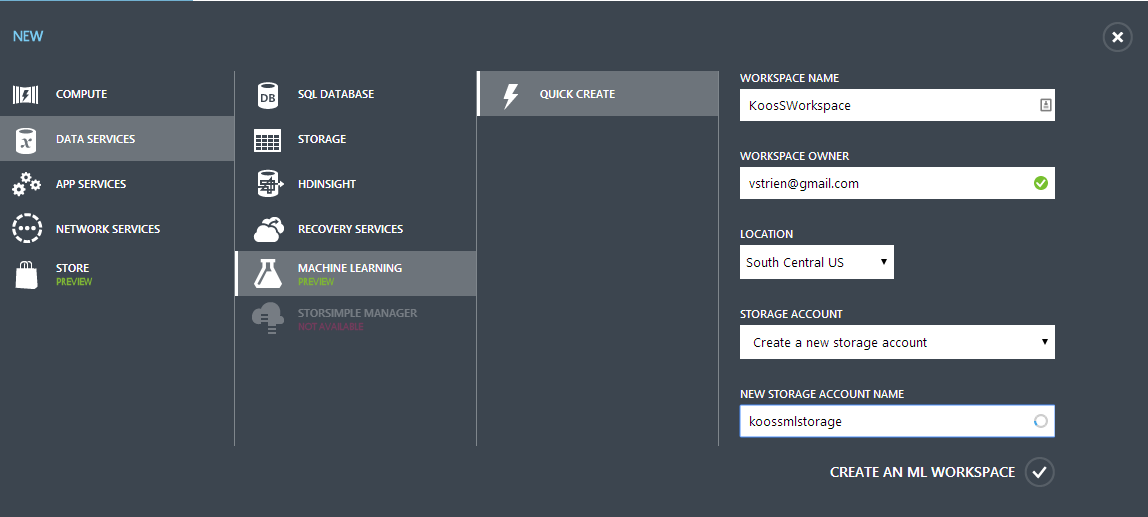
Machine Learning is an Azure Data Service like HDInsight, SQL Databases and Blob Storage. That means you can add it as a new service from within the Azure portal. After adding a ML Data Service (yes, you can add multiple), further development happens from whithin Azure ML Studio, which is a separate website running on https://studio.azureml.net. No local installs are needed and all development is done from within the browser.
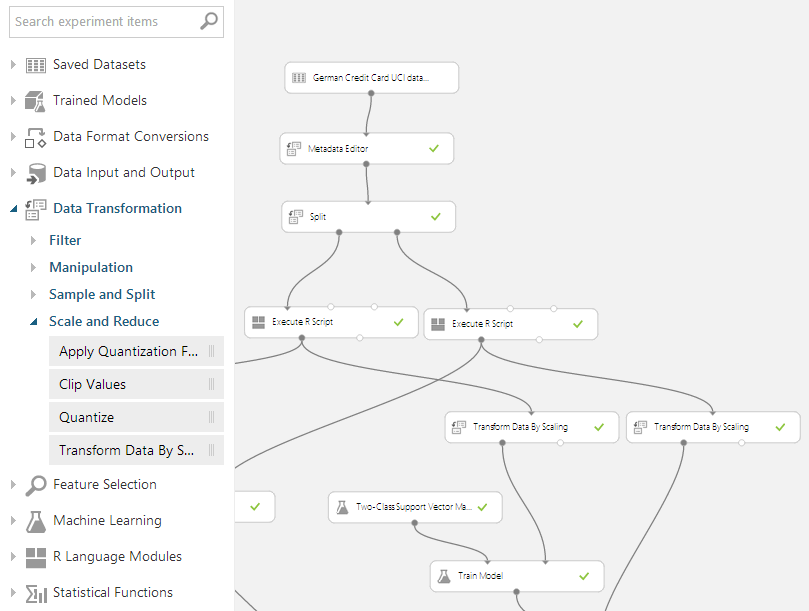
This works out pretty well. In ML Studio, a Data Flow is constructed not unlike the way we’re used to in SQL Server Integration Services (SSIS). Adding uploaded Data Sets, ML Models or transformations is just a matter of dragging boxes (‘Modules’ according to ML Studio) from the ‘Toolbox on the left’ to the working area. By connecting those boxes the data flow is defined. An intuitive way of handling data: without further training, I was immediately able to upload a dataset, split it into a training- and testing set, and do some transformations on the data.
The main missing things so far for me were the ability to rename the modules and the ability to attach always-visible labels to inputs, outputs or data flows. In the screenshot above, it’s hard to say what the ‘Split’ module is splitting, and whether it’s a randomized split or not. Even when I know that the split is a randomized split of test and training data with a ratio of 3 : 1, I cannot see whether the left output of the Split module is putting out 75% or 25%.
Comprehensiveness of available modules
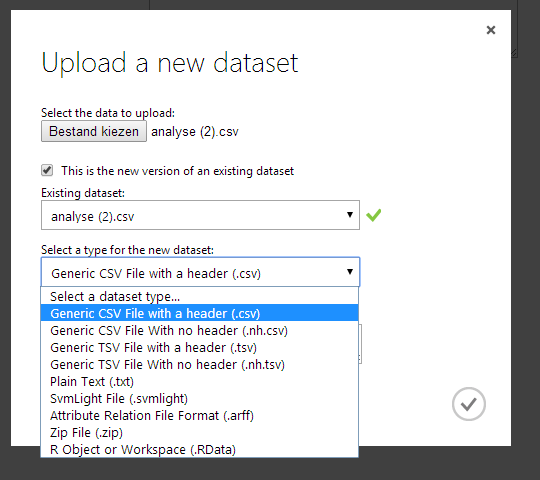
Adding new datasets is as easy as uploading a CSV-file (or another format, if you prefer). The possibilities to define how the data is structured inside the file are limited however: besides some default implementations like ‘comma-separated’ or ’tab-separated’, more advanced structures need to be pre-processed into simpler / supported structures before they can be used inside ML Studio.
Once the data is loaded, a comprehensive toolbox is at your hand to transform the data. To sample (pun intended) a few tools:
- Convert between datasets (to TSV, CSV, ARFF, etc.)
- Apply filters (median filters, moving average filters, threshold filters)
- Manipulate datasets (join, adding / removing columns, scrub missing values)
- Split and partition datasets
- Clip and quantize numeric values
On the analytic side, various functions are offered:
- Text Analytics
- Statistical functions
- Feature Selection
- Machine Learning
- R Language Modules
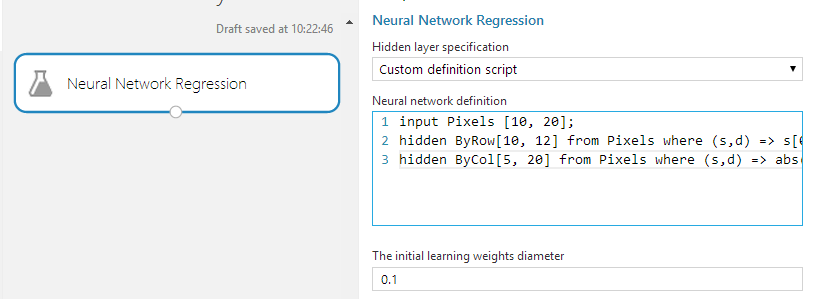
Skipping Text Analytics, Statistical functions and Feature selections we zoom in on Machine Learning. Three types of models are offered here: Classification, Clustering and Regression. Besides a collection of default implementations (each having parameters to tune), it’s also possible to create neural networks using a custom definition script, making it possible to process and analyse all kinds of non-default data like images.
Compared to the way Data Mining algorithms are present in SQL Server Analysis Services, this really feels like a giant leap forward: the way algorithms can be tuned, implemented, tested and compared is not only much easier to use, but also easier to tune and customize.
Integration of R
Particularly interesting is the possibility to integrate R scripts into your ML Experiment. When dragging the ‘Execute R Script’ module to the working canvas, you are provided with a module accepting two data inputs and an input for a zipped script bundle. You can also directly enter R scripts into the properties of the R module. On the output side, two outputs are offered. You can bind the input and output ports from within the R script. The number of inputs / outputs is fixed, but you don’t have to use them all.
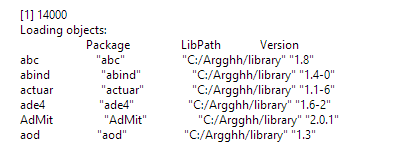
Curious to see which packages were installed, I’ve tried to list all installed modules by using the R command installed.packages(). It turns out there are around 14000 packages installed, so I will not include the complete list here. You can be pretty sure that the majority of your desired packages will be available though. Funny detail: in the sandbox where R is executed, Microsoft has installed it into the directory ‘C:/Argghh’ :-).
Opening up your experiments to the world
While developing a Machine Learning experiment, you can run the experiment from within the editor. This works neat and gives fast feedback about your experiment. Also, several modules to compare Machine Learning methods are available and quite easy to use. But all this is still in the development stage of your Machine Learning experiment.
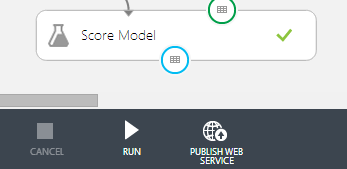
In order to open up your experiments for use inside from within other solutions, Azure ML offers the possibility to publish any experiment as a Web Service, which can be called upon both per-case or in bulk.
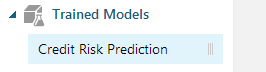
Preparing your experiment for deployment is quite easy: in an experiment where the model has been trained with development data, you can save the trained model. This generates a new module in your toolbox, which can directly be used in both existing and new experiments.
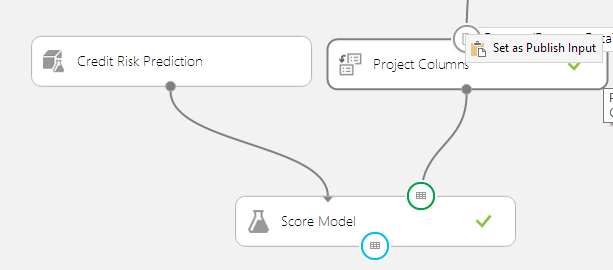
As a second step, you can define where in the data flow the data from the API flows in and out. When calling on the experiment via the API, these entry and exit points are used instead of the manually uploaded datasets. Doing this is as easy as right-clicking an input and saying ‘Set as Publish Input’.
By using the button ‘Publish Web Service’ inside the editor, the solution is published in ’test’. You can then easily test the API via your Azure environment. Administrators can make this web service publicly available.

Summary and Conclusion
Being a Business Intelligence professional, I have some experience with Data Mining, but I’m certainly not a Machine Learning expert. The way Machine Learning can be used inside data solutions is impressive. Particularly impressive is the ease of training models and re-using already-trained models.
The way R is integrated in AzureML really stands out for me. I think this opens up a range of new appliances for R. Where R is nowadays widely used in an expiremental or ad-hoc setting, this opens up the way for deployed, managed and re-usable solutions that can easily be integrated for both small and larger datasets.
IMHO Microsoft has done a good job with Azure Machine Learning. The result is an easy-to-use solution, making the operations on data in order to perform analysis highly visible. The way in which these models can be deployed is a huge benefit, opening up the ML solutions towards enterprise solutions. Although there is surely room for improvement, for now this seems to be a solid platform which can easily be extended.