Deploy from VSTS to Azure using the Azure Resource Manager
In this blog post I am going to demonstrate how to use the Azure Resource Manager (ARM) with VSTS. With the ARM you can integrate Azure into your VSTS release management pipeline and this will enable you to deploy your Azure Web Apps and run remote PowerShell scripts.
Creating the ARM endpoint
The first thing we need to do is to create an endpoint in the form of a App registration. This App registration will be used to bridge the gap between VSTS and Azure. Keep in mind that the following actions require a privileged Azure account.
- Open the Azure portal
- Go to Azure Active Directory and click on App registrations
- Click on New application registration
- Enter a name for your application and choose type “Web app / API”
- The sign-on URL is the URL of your VSTS server
- Click on Create
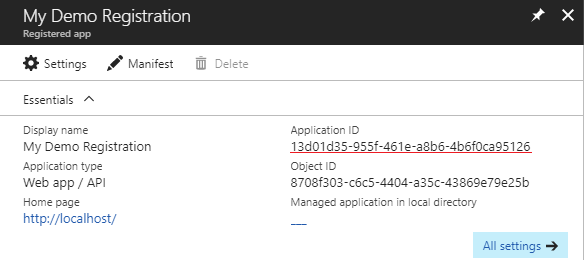
Open your newly created App registration and write down the Application ID.
Now we will create a key for the authentication.
- Click on All Settings and go to Keys
- Create a new key and don’t forget to write down the generated password. You only get to see the key once.

Next, we give the App Registration permissions to manage the Resource Group.
- Go to your Resource Group and click on Access control (IAM)
- Add your App registration with the permission Contributor
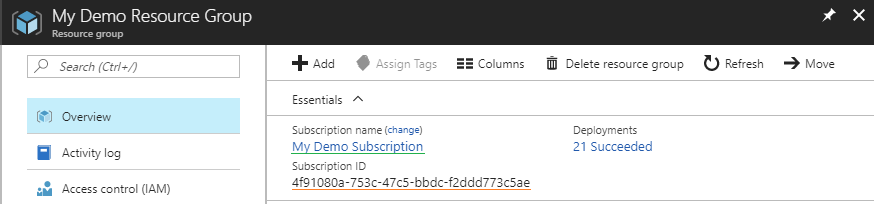
Now we need to write down our Subscription name and our Subscription ID. You can find this information on the Overview menu of your Resource Group.
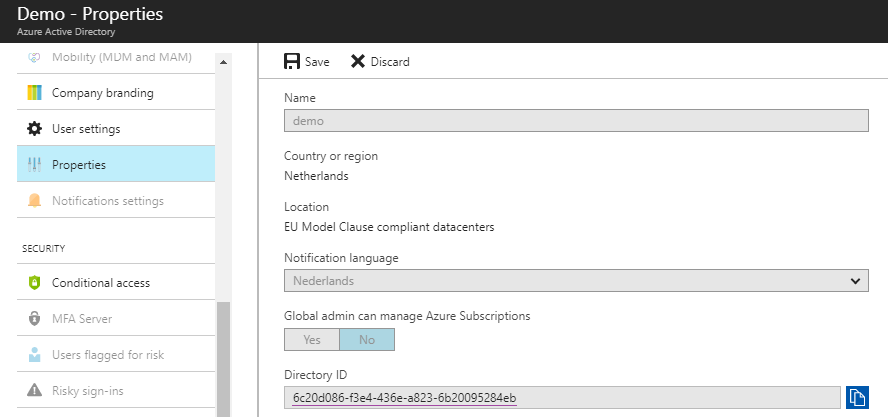
The last thing to get is the Tenant ID. You can find this in the Properties menu of the your Azure Active Directory. Here it is labeled as the Directory ID.
Now we have collected all the information in Azure. It is time to go to VSTS.
Connecting to the ARM endpoint
To create an endpoint connection, first navigate to the Services settings under the gear wheel icon in VSTS. Select from the dropdown menu a new Azure Resource Manager. Fill in all the information in the fields that you have written down in the previous steps.
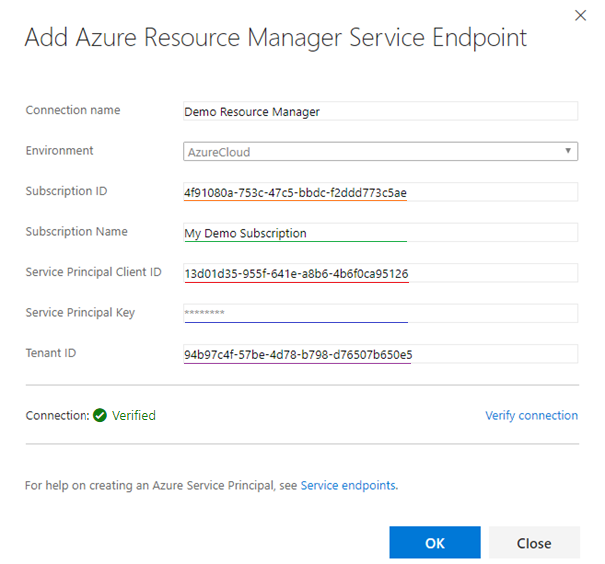
When finished, click on Verify connection. If everything is filled in correctly, you will see a green check mark with the text ‘verified’. Now we are all set to go to the last step.
Deploying with the ARM endpoint
You can now use the ARM endpoint in your Release Definition to run Azure Tasks.
If you want to deploy your WebApp you only have to select ARM endpoint from the Azure subscription dropdown in the Azure App Service Deploy Task. The dropdown with all the available App Services will be automatically filled in.
If the App Service does not exist in the dropdown, this means that the ARM endpoint has no Contributor permissions to that App Service.
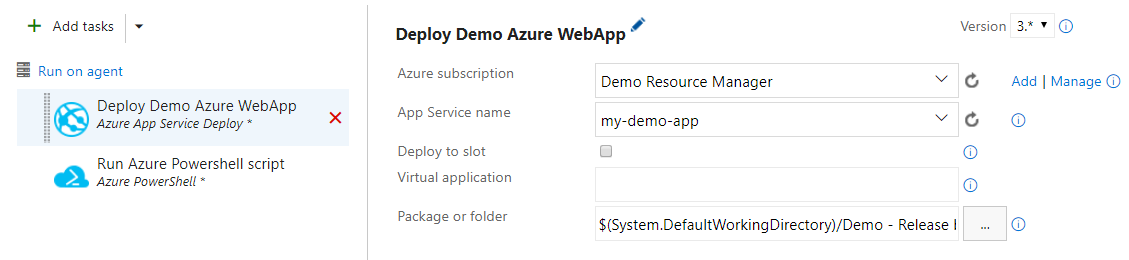
To run PowerShell scripts with AzureRM cmdlets, you use the Azure Powershell Task. Keep in mind that you don’t need to use the Login-AzureRmAccount cmdlet in your PowerShell script. The task will take care of the authentication and creates a connection to Azure before invoking your script.
Hopefully this will make your deployment to Azure faster and easier.